15% OFF ALL SERVICES THIS JANUARY
4) Remove Carpet

Remove the carpet by cutting it into 3ft sections, roll it up and recycle it along with the carpet pad. Remove the tack strip and dispose of it. Remove all staples from the sub floor. Sink any nails and screws that are present.
5) Prep Subfloor
Check the subfloor to make sure it is free of debris, staples & nails. Screw down any problem squeaky areas in the subfloor. Locate and mark all of the floor joist or trusses. Lay out rosin paper over the subfloor (pictured above)
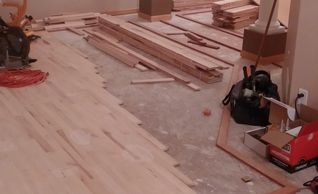
6) Lay out Border / First Row
6) Lay out Border / First Row

Measure the room and Lay out the Border , or lay out your first row of flooring if there is no border or other design.
7) Begin Installation
8) Finish Install/ Begin Sanding
6) Lay out Border / First Row
Begin Installing the field of the floor making sure that it is being installed to the manufacturers specifications, especially with Prefinished/Manufactured flooring.
8) Finish Install/ Begin Sanding
8) Finish Install/ Begin Sanding
8) Finish Install/ Begin Sanding
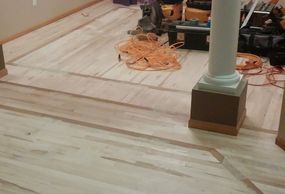
Finish the last boards up along the finishing wall. Pack up install equipment. Unload Sanding equipment and begin sanding.
9) Apply Finish
8) Finish Install/ Begin Sanding
8) Finish Install/ Begin Sanding
Finish Sanding and apply stain and three coats of polyurethane for a beautiful finished product!